4. Forms
In this chapter, we’ll implement the operations that will let us modify the collection, like adding a new movie and deleting an existing movie. These operations require the use of forms containing components such as text boxes and check boxes. The resulting pages are given in Fig. 4.1 and Fig. 4.2.
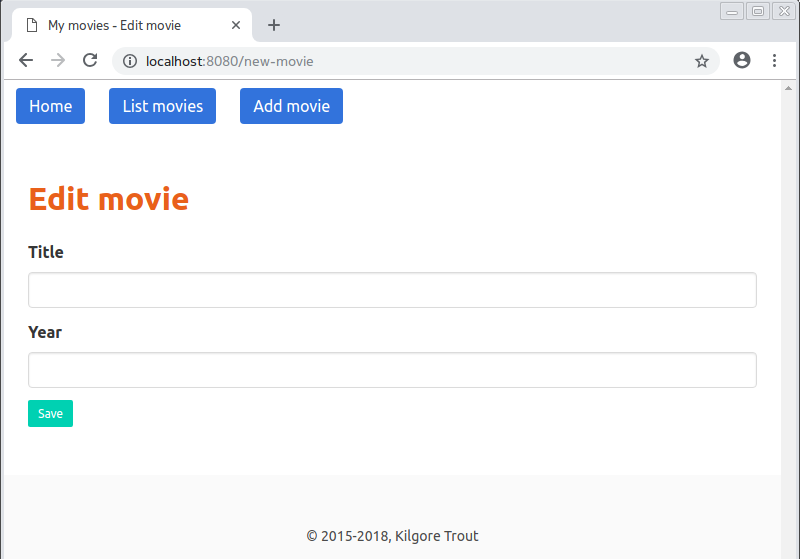
Fig. 4.1 Form for adding a movie.

Fig. 4.2 Form for deleting movies.
4.1. Posting Data
First, we’ll create a form to add a movie. Add an HTML template file named
templates/movie_edit.html and arrange its contents as in
Listing 4.1. Note that this is mostly a static template,
with only the minimum and maximum allowed year values taken as parameters
for the year input (lines 17-18).
templates/movie_edit.html, version: v0401).¶1 2 3 4 5 6 7 8 9 10 11 12 13 14 15 16 17 18 19 20 21 22 23 24 25 26 27 28 | {% extends "layout.html" %}
{% block title %}Edit movie{% endblock %}
{% block content %}
<h1 class="title">Edit movie</h1>
<form action="" method="post" name="movie_edit">
<div class="field">
<label for="title" class="label">Title</label>
<div class="control">
<input type="text" name="title" class="input" required="required"/>
</div>
</div>
<div class="field">
<label for="year" class="label">Year</label>
<div class="control">
<input type="number" name="year" class="input"
min="{{ min_year }}" max="{{ max_year }}"/>
</div>
</div>
<div class="field is-grouped">
<div class="control">
<button class="button is-primary is-small">Save</button>
</div>
</div>
</form>
{% endblock %}
|
Since the action attribute of the form element is empty (line 6),
when the “Save” button is clicked, the form data will be posted to the same
address as the current one. Therefore, the view function for this page
has to be able to handle two types of requests (Listing 4.2):
- Requests with no data. These use the HTTP GET method. The response will be an empty form for a new movie (lines 2-5).
- Request with the data of the movie to save. These use the HTTP POST method (lines 6-12).
1 2 3 4 5 6 7 8 9 10 11 12 | def movie_add_page():
if request.method == "GET":
return render_template(
"movie_edit.html", min_year=1887, max_year=datetime.now().year
)
else:
form_title = request.form["title"]
form_year = request.form["year"]
movie = Movie(form_title, year=int(form_year) if form_year else None)
db = current_app.config["db"]
movie_key = db.add_movie(movie)
return redirect(url_for("movie_page", movie_key=movie_key))
|
The data that was posted is retrieved through the request variable
(lines 7-8) and a movie is created with the given data (line 9). We add
the movie to the database (lines 10-11) and get the key that was assigned
to it. After the operation is completed, we redirect the client
to the display page for the added movie (line 12) instead of showing
a new type of page. Note that this code requires the following names
to be imported from Flask: request, redirect, url_for.
In order for a view function to be able to respond to both GET and POST
methods, these need to be allowed when registering the route
(Listing 4.3, lines 7-8).
1 2 3 4 5 6 7 8 9 10 11 12 13 14 15 16 | --- /home/uyar/Projects/flask-tutorial/app/v0302b/server.py
+++ /home/uyar/Projects/flask-tutorial/app/v0401/server.py
@@ -12,10 +12,11 @@
app.add_url_rule("/", view_func=views.home_page)
app.add_url_rule("/movies", view_func=views.movies_page)
app.add_url_rule("/movies/<int:movie_key>", view_func=views.movie_page)
+ app.add_url_rule(
+ "/new-movie", view_func=views.movie_add_page, methods=["GET", "POST"]
+ )
db = Database()
- db.add_movie(Movie("Slaughterhouse-Five", year=1972))
- db.add_movie(Movie("The Shining"))
app.config["db"] = db
return app
|
Now that we can add movies to the collection, we don’t need the sample movie
data in the server.py file anymore (lines 12-13).
To make this page accessible from other pages, we add a link to the global navigation panel (Listing 4.4, lines 8-10).
templates/layout.html, version: v0401)¶1 2 3 4 5 6 7 8 9 10 11 | <div class="navbar-brand">
<span class="navbar-item">
<a class="button is-link" href="{{ url_for('home_page') }}">Home</a>
</span>
<span class="navbar-item">
<a class="button is-link" href="{{ url_for('movies_page') }}">List movies</a>
</span>
<span class="navbar-item">
<a class="button is-link" href="{{ url_for('movie_add_page') }}">Add movie</a>
</span>
</div>
|
4.2. Posting Lists
Our next step is to delete movies from the collection. We will change the movie list page so that there will be a check box next to every movie. There will also be a delete button which, when clicked, will cause all checked movies to be deleted. First, we change the template for the movie list page as in Listing 4.5.
templates/movies.html, version: v0402)¶1 2 3 4 5 6 7 8 9 10 11 12 13 14 15 16 17 18 19 20 21 22 23 24 25 26 27 28 29 30 31 | {% extends "layout.html" %}
{% block title %}Movie list{% endblock %}
{% block content %}
<h1 class="title">Movies</h1>
{% if movies %}
<form action="" method="post" name="movie_list">
<table class="table is-striped is-fullwidth">
{% for movie_key, movie in movies %}
<tr>
<td>
<label class="checkbox">
<input type="checkbox" name="movie_keys" value="{{ movie_key }}"/>
</label>
<a href="{{ url_for('movie_page', movie_key=movie_key) }}">
{{ movie.title }}
{% if movie.year %} ({{ movie.year }}) {% endif %}
</a>
</td>
</tr>
{% endfor %}
</table>
<div class="field is-grouped">
<div class="control">
<button class="button is-danger is-small">Delete</button>
</div>
</div>
</form>
{% endif %}
{% endblock %}
|
Since this page is now going to be used to post data to the server,
the elements are placed into a form (between lines 7 and 29). The data
will be posted to the same address, and the keys of the selected movies
will be accumulated in the movie_keys variable (line 13). And finally,
there is the button element for submitting the form (line 26).
Like the movie_add_page handler, now the movies_page handler also needs
to handle two types of requests. One for displaying the movies and letting
the user select the movies to delete (GET method) and one for deleting
the movies selected by the user (POST method).
1 2 3 4 5 6 7 8 9 10 | def movies_page():
db = current_app.config["db"]
if request.method == "GET":
movies = db.get_movies()
return render_template("movies.html", movies=sorted(movies))
else:
form_movie_keys = request.form.getlist("movie_keys")
for form_movie_key in form_movie_keys:
db.delete_movie(int(form_movie_key))
return redirect(url_for("movies_page"))
|
When posting a collection of data, we have to use the getlist method
(Listing 4.6, line 7). In this example, the keys
of the selected movies selected will be put into a list and assigned
to the movie_keys variable.
Also remember that the view function has to be adjusted to accept both GET
and POST methods (Listing 4.7):
1 2 3 4 5 6 7 8 9 10 11 12 13 | --- /home/uyar/Projects/flask-tutorial/app/v0401/server.py
+++ /home/uyar/Projects/flask-tutorial/app/v0402/server.py
@@ -10,7 +10,9 @@
app.config.from_object("settings")
app.add_url_rule("/", view_func=views.home_page)
- app.add_url_rule("/movies", view_func=views.movies_page)
+ app.add_url_rule(
+ "/movies", view_func=views.movies_page, methods=["GET", "POST"]
+ )
app.add_url_rule("/movies/<int:movie_key>", view_func=views.movie_page)
app.add_url_rule(
"/new-movie", view_func=views.movie_add_page, methods=["GET", "POST"]
|
Exercise 1
Add a link to the movie display page which, when clicked, will take the user
to the movie edit page. The URL of the edit page has to have the extra path
/edit after the movie display page URL. That means, for example,
the edit page of movie with key 1 has to be /movies/1/edit.
After saving, the movie has to be updated in the collection, and not added
a second time. (Solution)
4.3. Validating Inputs
A very important aspect of web application development is making sure that the data received from the outside world contains sensible values. This not only makes the application more robust with respect to user errors, it’s also crucial for preventing security issues. Any received data, such as values supplied by users, or values read from databases must be validated.
At the moment, when editing movies, our view functions assume that the received movie data is valid. The HTML markup defines constraints for the inputs to enforce validity:
- The
titleinput is marked as required (Listing 4.1, line 10). So if the user leaves this field blank, the browser will not submit the form and force the user to fill it in. - The
yearinput has the typenumberwith minimum and maximum allowed values (lines 17-18). So the browser won’t allow the user to send non-numeric symbols, or any value that’s not within this range.
But these protections are not sufficient:
Since the
titleinput is required it can’t be left blank, but a title consisting of only whitespace is accepted.Even worse, it’s possible post any arbitrary data to the corresponding URL directly, bypassing any restriction defined in the HTML markup. For example, A non-numeric value for the
yearinput can be sent by issuing the following command from the command line, causing the server to fail:$ curl --data "title=Grease&year=abc" http://localhost:8080/new-movie ... ValueError: invalid literal for int() with base 10: 'abc'
To solve these problems, we’ll start by adding a function to validate
the sent form (Listing 4.8). This function will take a form
as parameter and return whether there are any errors in it. It attaches
two attributes to the form: one for data and one for the error messages
(lines 2-3). For every input, it either adds an error entry if the value
is not validated (as in line 7 for title), or it adds a data entry (as in
line 9 for title). When adding the data entry, it also does type conversion
if necessary (as in lines 17 and 21 for year). If all data is valid, errors
will be empty and the function will return True (line 23).
1 2 3 4 5 6 7 8 9 10 11 12 13 14 15 16 17 18 19 20 21 22 23 | def validate_movie_form(form):
form.data = {}
form.errors = {}
form_title = form.get("title", "").strip()
if len(form_title) == 0:
form.errors["title"] = "Title can not be blank."
else:
form.data["title"] = form_title
form_year = form.get("year")
if not form_year:
form.data["year"] = None
elif not form_year.isdigit():
form.errors["year"] = "Year must consist of digits only."
else:
year = int(form_year)
if (year < 1887) or (year > datetime.now().year):
form.errors["year"] = "Year not in valid range."
else:
form.data["year"] = year
return len(form.errors) == 0
|
Next, our movie addition page handler will call this function to validate
the form it received (Listing 4.9, line 11). If the form
is not valid, it will be rendered again, this time using the data
in the submitted form as the default values (lines 13-18), so that the user
won’t have to enter all fields again. If the form is valid, the data
for the new movie can now be taken from the data attribute
that was attached to the form by the validator function (lines 19-20).
1 2 3 4 5 6 7 8 9 10 11 12 13 14 15 16 17 18 19 20 21 22 23 24 | def movie_add_page():
if request.method == "GET":
values = {"title": "", "year": ""}
return render_template(
"movie_edit.html",
min_year=1887,
max_year=datetime.now().year,
values=values,
)
else:
valid = validate_movie_form(request.form)
if not valid:
return render_template(
"movie_edit.html",
min_year=1887,
max_year=datetime.now().year,
values=request.form,
)
title = request.form.data["title"]
year = request.form.data["year"]
movie = Movie(title, year=year)
db = current_app.config["db"]
movie_key = db.add_movie(movie)
return redirect(url_for("movie_page", movie_key=movie_key))
|
Also remember that the validator attaches error messages to the form and these messages can now be displayed when the form is re-rendered after an invalid submission (Listing 4.10, lines 13-17 and 27-31).
templates/movie_edit.html, version: v0403)¶1 2 3 4 5 6 7 8 9 10 11 12 13 14 15 16 17 18 19 20 21 22 23 24 25 26 27 28 29 30 31 32 33 34 35 36 37 38 39 40 | {% extends "layout.html" %}
{% block title %}Edit movie{% endblock %}
{% block content %}
<h1 class="title">Edit movie</h1>
<form action="" method="post" name="movie_edit">
<div class="field">
<label for="title" class="label">Title</label>
<div class="control">
<input type="text" name="title" class="input" required="required"
value="{{ values['title'] }}"/>
</div>
{% if 'title' in values.errors %}
<p class="help has-background-warning">
{{ values.errors['title'] }}
</p>
{% endif %}
</div>
<div class="field">
<label for="year" class="label">Year</label>
<div class="control">
<input type="number" name="year" class="input"
min="{{ min_year }}" max="{{ max_year }}"
value="{{ values['year'] }}"/>
</div>
{% if 'year' in values.errors %}
<p class="help has-background-warning">
{{ values.errors['year'] }}
</p>
{% endif %}
</div>
<div class="field is-grouped">
<div class="control">
<button class="button is-primary is-small">Save</button>
</div>
</div>
</form>
{% endblock %}
|
And similar arrangements have to be made in the movie editing handler (Listing 4.11).
1 2 3 4 5 6 7 8 9 10 11 12 13 14 15 16 17 18 19 20 21 22 23 24 25 26 27 28 | def movie_edit_page(movie_key):
if request.method == "GET":
db = current_app.config["db"]
movie = db.get_movie(movie_key)
if movie is None:
abort(404)
values = {"title": movie.title, "year": movie.year}
return render_template(
"movie_edit.html",
min_year=1887,
max_year=datetime.now().year,
values=values,
)
else:
valid = validate_movie_form(request.form)
if not valid:
return render_template(
"movie_edit.html",
min_year=1887,
max_year=datetime.now().year,
values=request.form,
)
title = request.form.data["title"]
year = request.form.data["year"]
movie = Movie(title, year=year)
db = current_app.config["db"]
db.update_movie(movie_key, movie)
return redirect(url_for("movie_page", movie_key=movie_key))
|
Exercise 2
Replace the input validation mechanism with an implementation that uses
the Flask-WTF plugin. Also make use of its CSRF protection features.
For handling number type inputs, use the wtforms_components package.
(Solution)