I did not get any support from the company. On the Internet, you can find support from the pages which contain information about the Bluetooth and serial communication for the Linux.
On the Raspberry Pi 3:
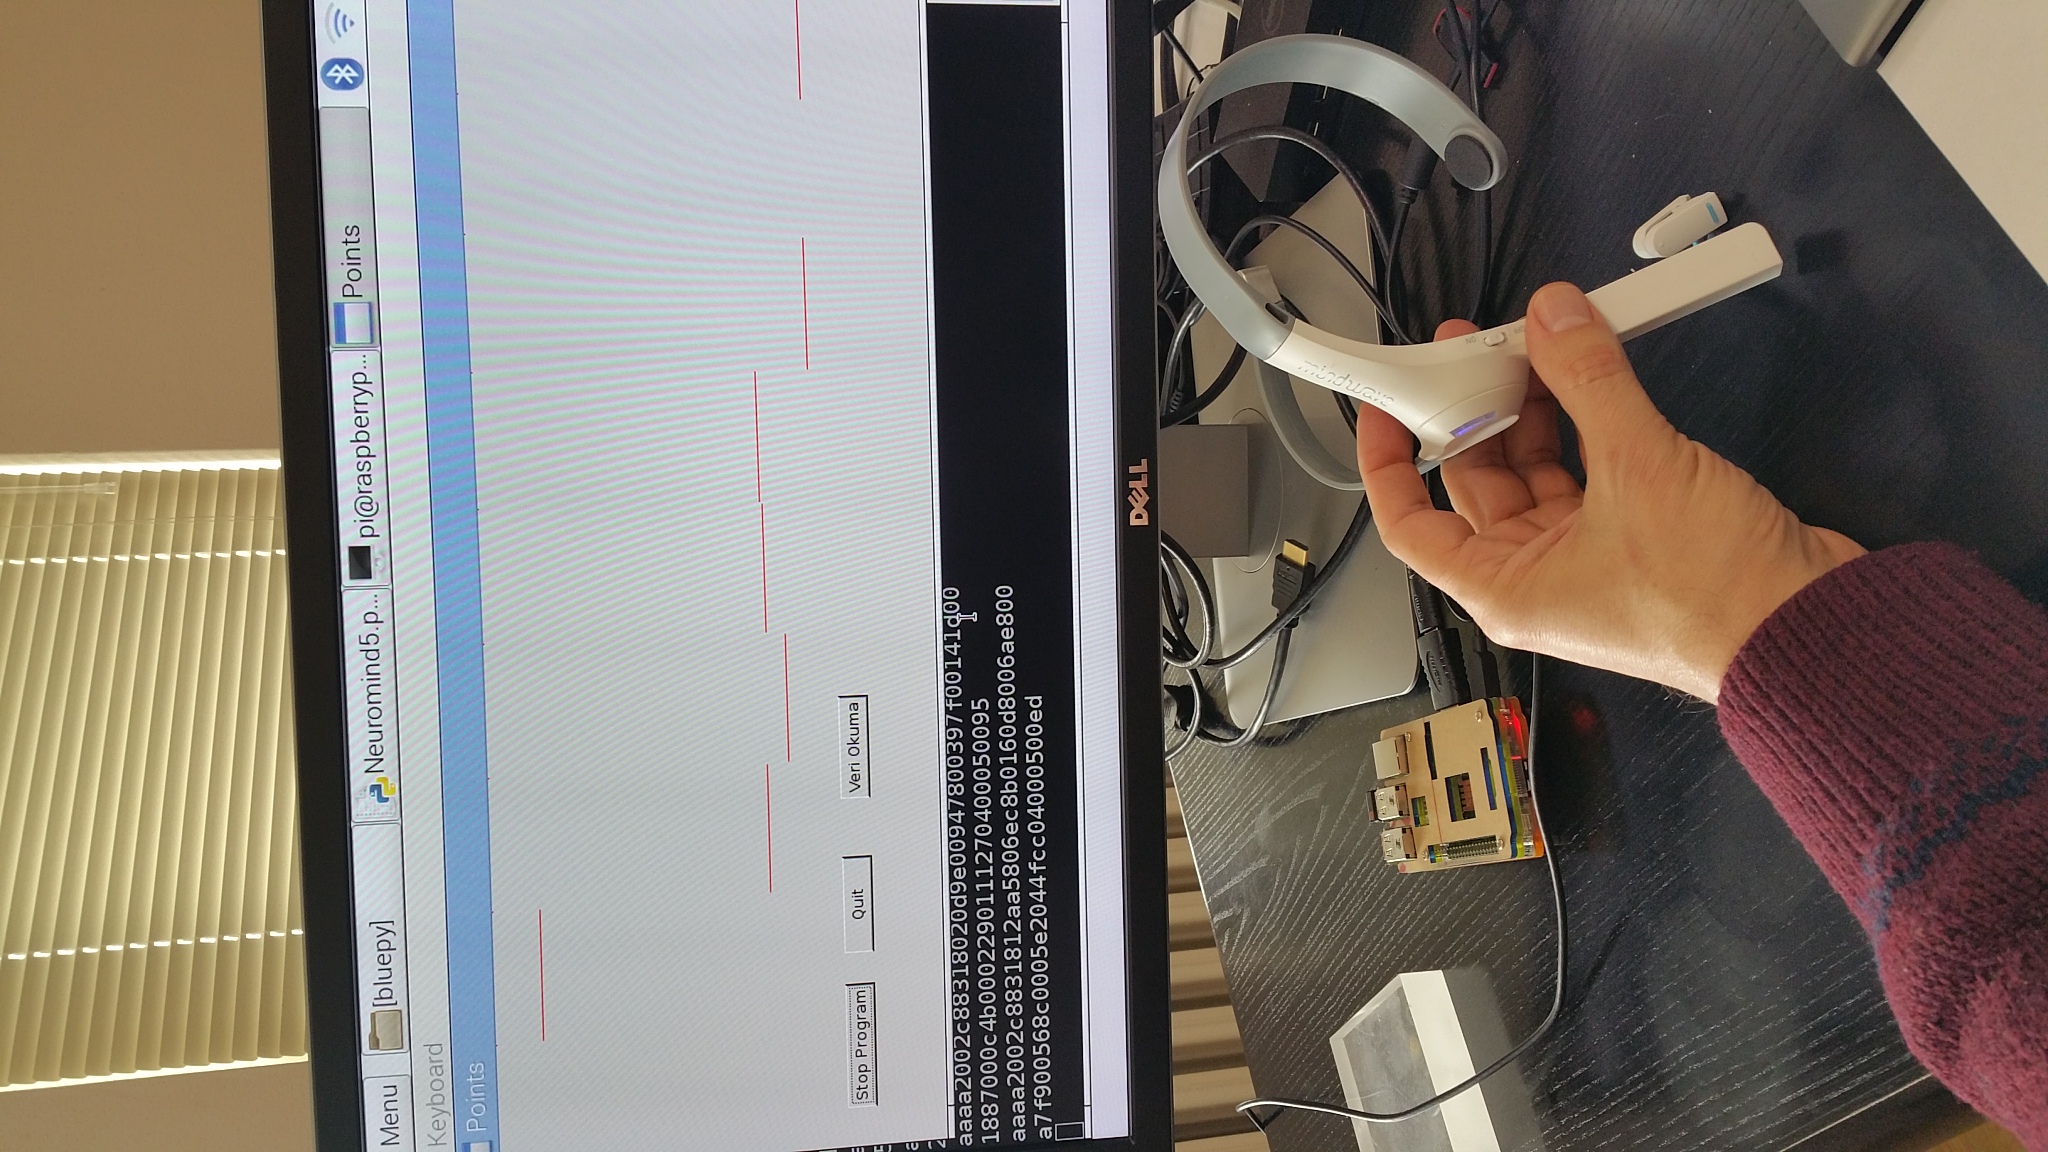
After installing the PyQt and
the BluePy module, you can acquire all data
from the Mindwave headset by using the
Bluetooth interface as shown
in Figure 1. Python file is
given in this web site: Python File. In this file, MAC address must be changed in order to enable the
program to connect to your Mindwave
headset.
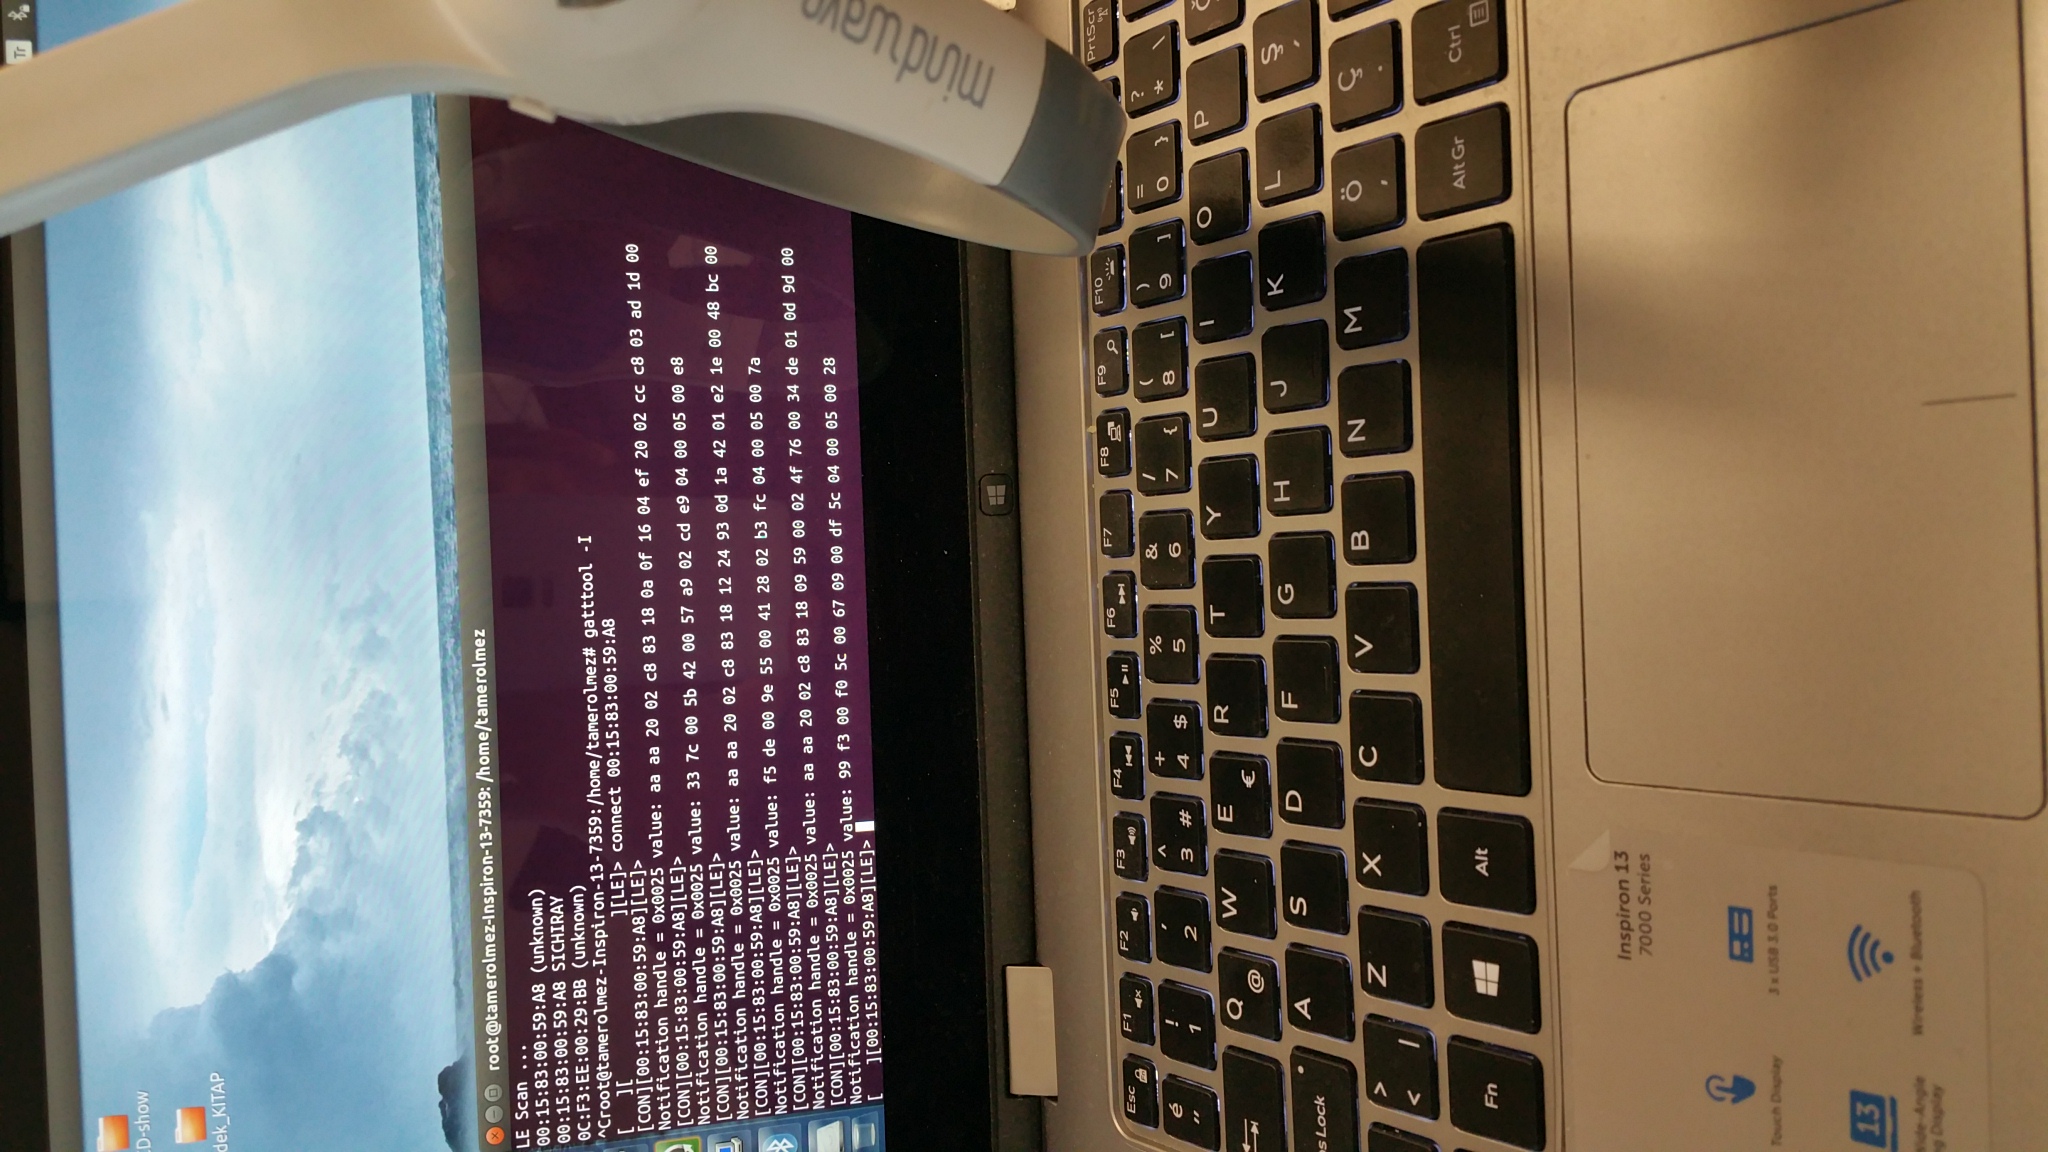
You should test your device as follows:
1) Find the MAC address
of your Mindwave headset by using
“hcitool lescan” command.
2) Start
the data transmission
by using “gatttool -I” and “connect MACAddress” commands as shown in Figure 2.
On the MS
Windows 10:
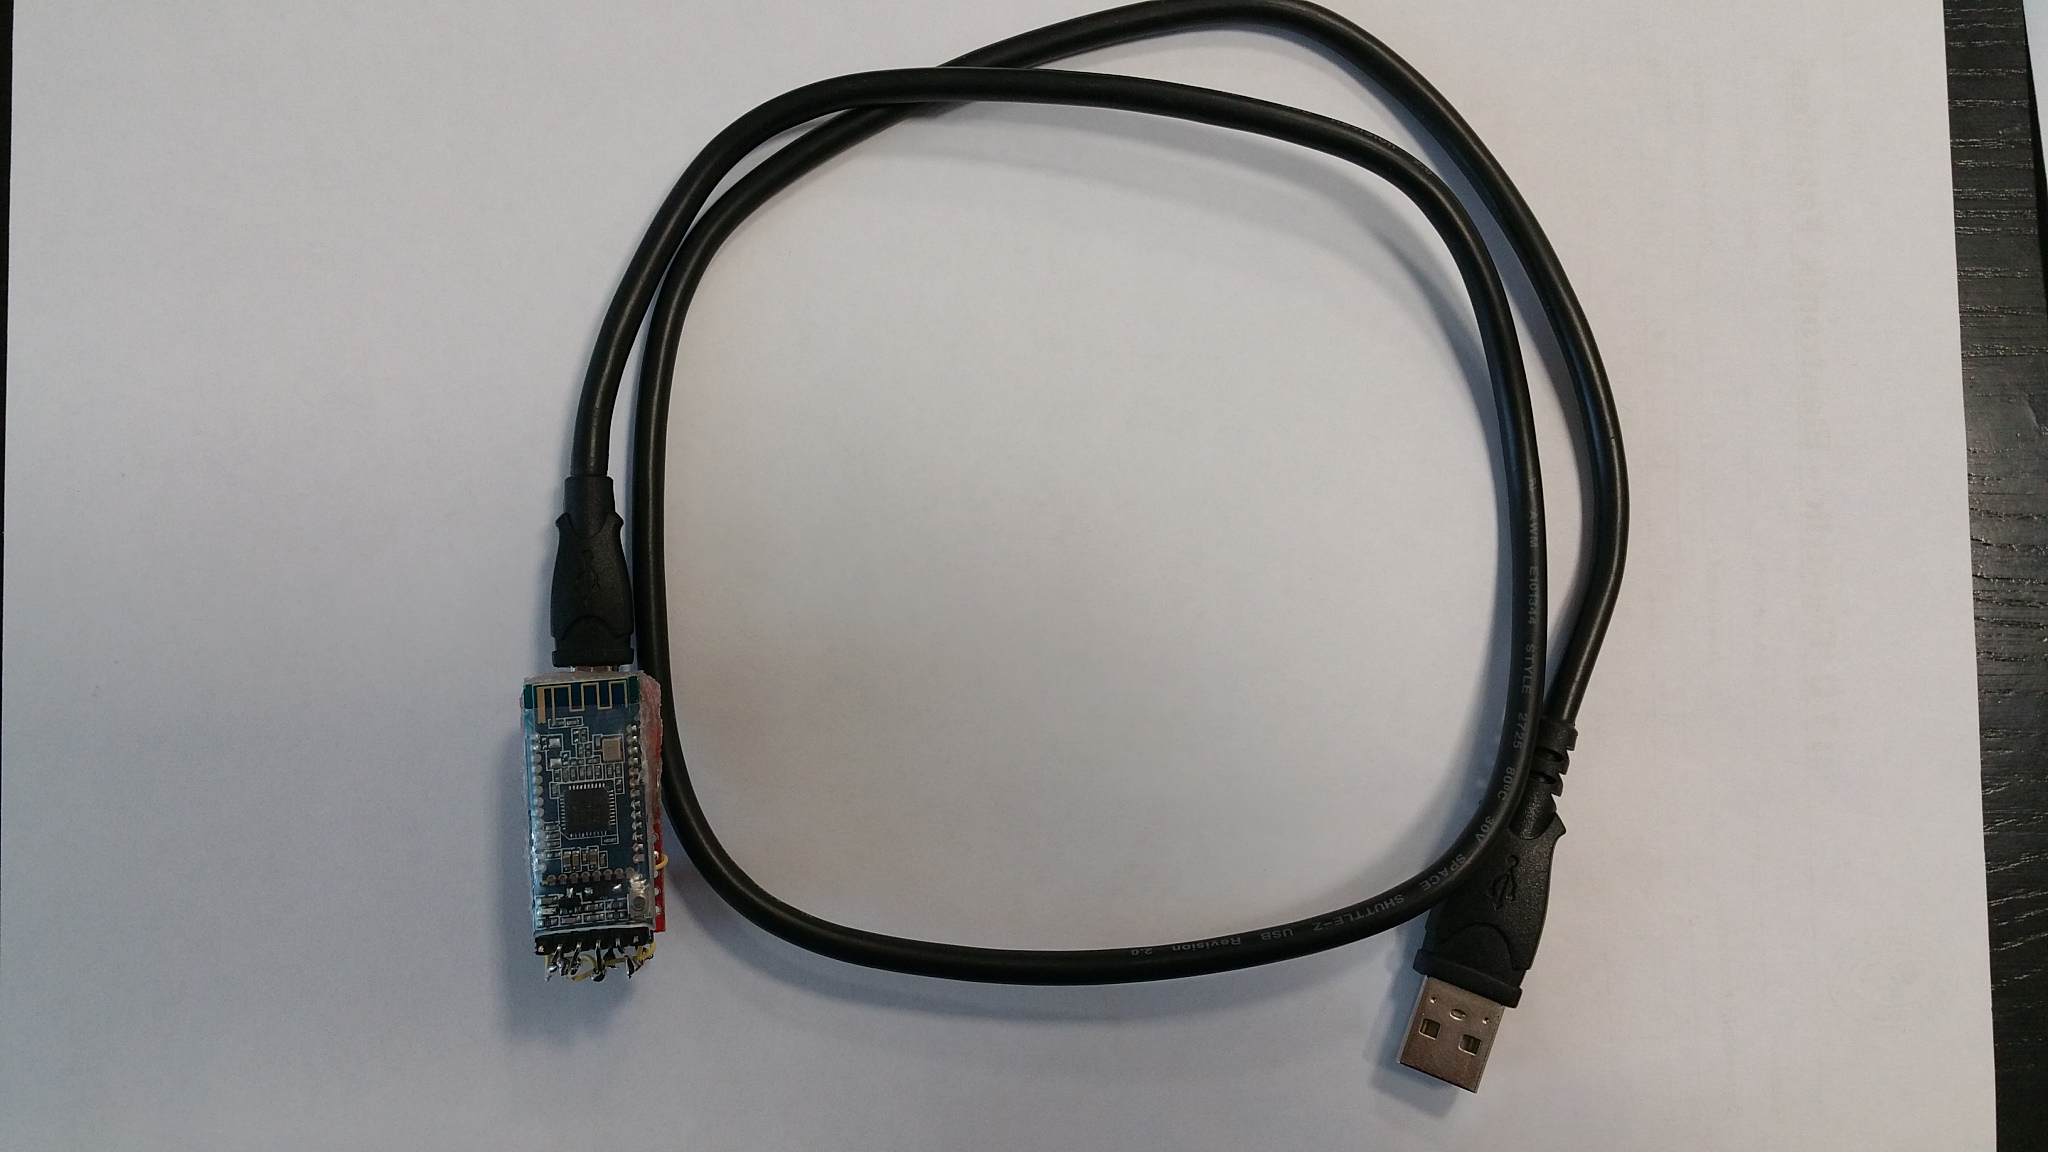
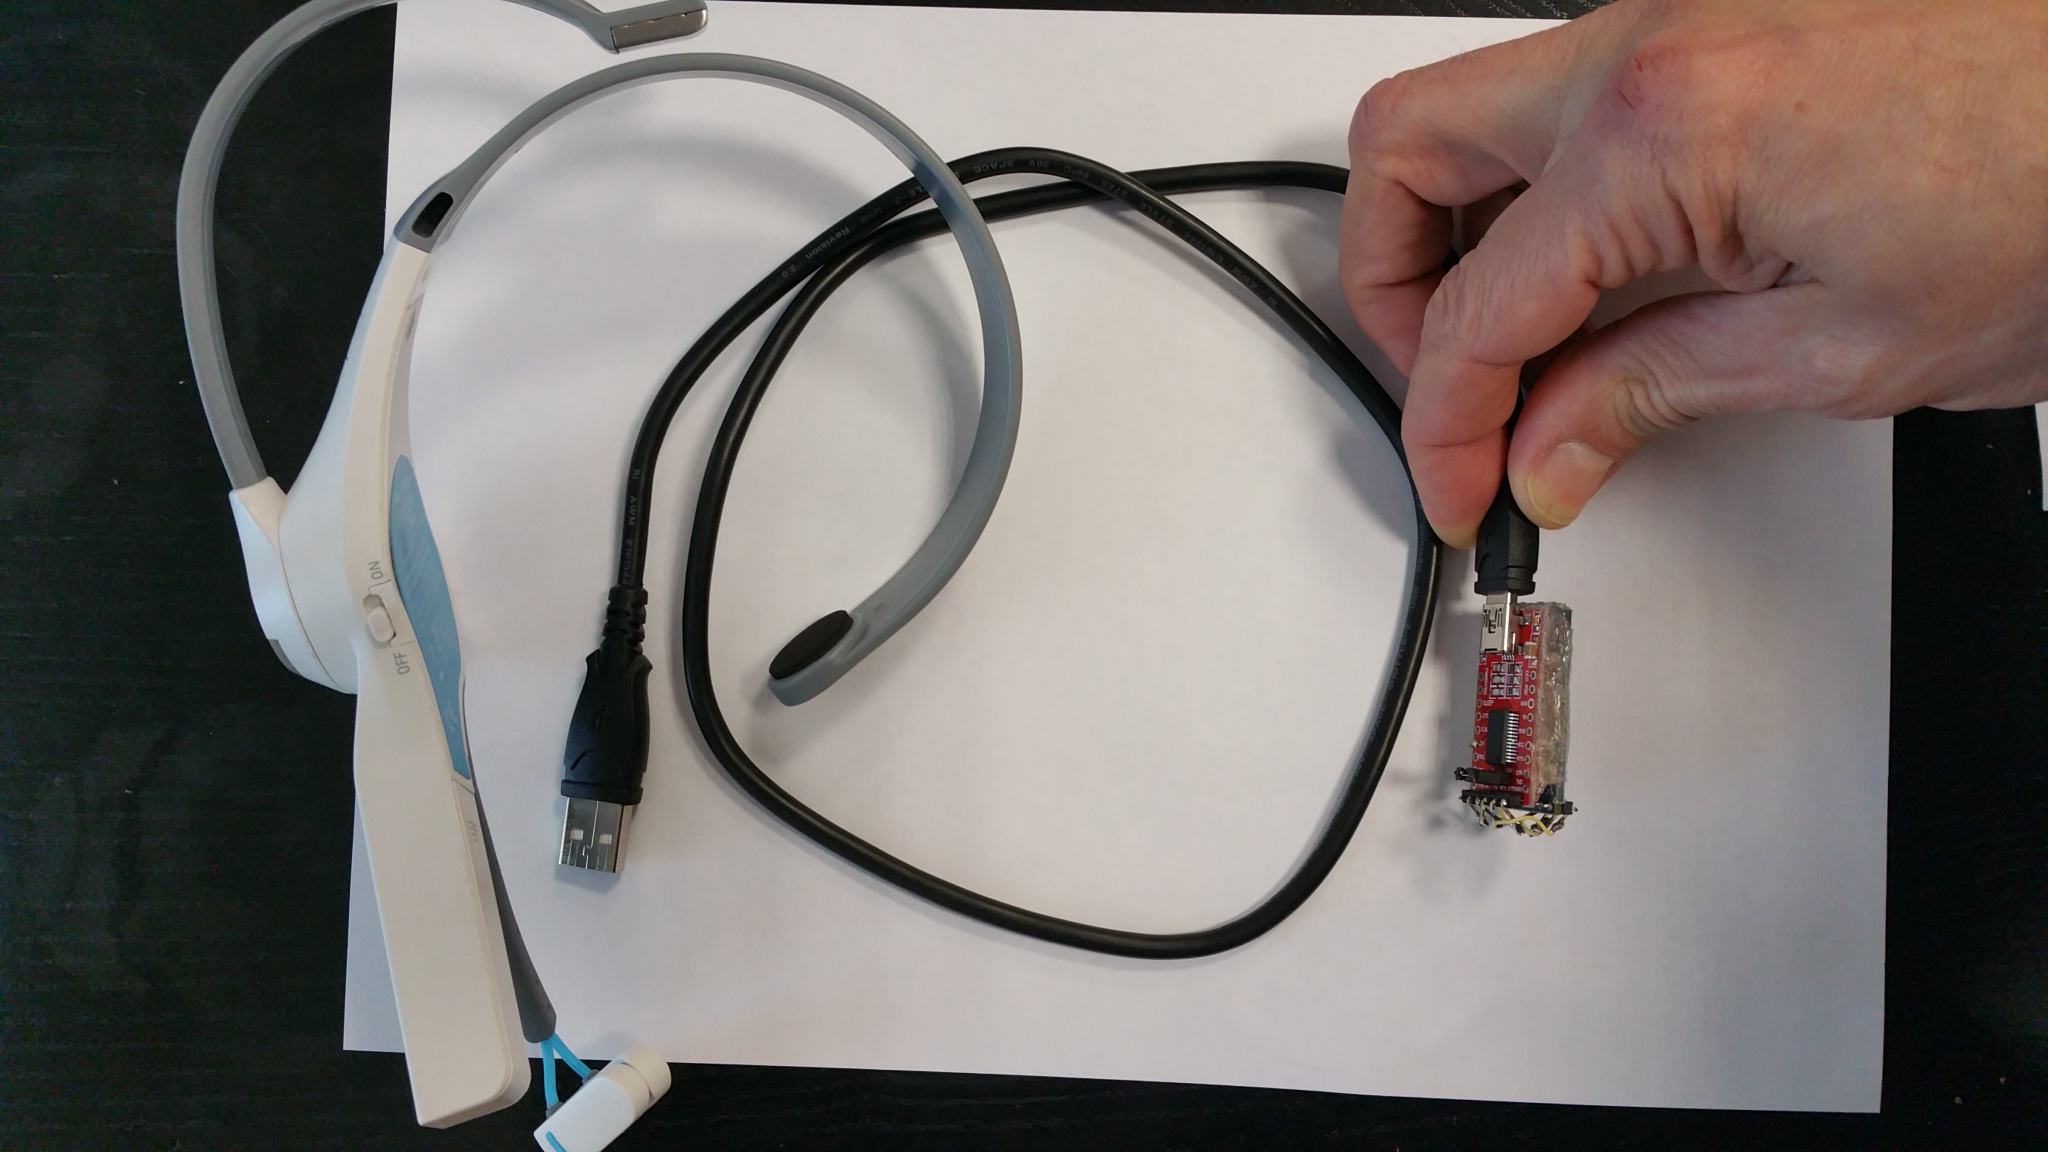
First of all, the UART of HM10 Bluetooth module must be tied to the UART of USB TO UART module as shown in the following figures:
TX of the HM10 Bluetooth module = RX of the USB TO UART module
RX of the HM10 Bluetooth module = TX of the USB TO UART module
GND of the HM10 Bluetooth module = GND of the USB TO UART module
VCC of the HM10 Bluetooth module = 5V pin at the side of the USB TO UART module
Set the switch of the USB TO UART module to 3.3V for TX-RX compatibility
You can find ascii command set of HM10 Bluetooth module on the Internet. You can test your hardware using “echo” and “cat” commands on a Linux machine as shown in Figure 5. Open two terminals on the Linux machine (or Raspberry Pi). On the first terminal, use “echo” commands. On the second terminal, use “cat” command.
1. Terminal> echo “AT” > /dev/ttyUSB0
2. Terminal> cat /dev/ttyUSB0
To pair your Mindwave
headset with the HM10 Bluetooth module, use the following command:
1. Terminal> echo “AT+ROLE1” >
/dev/ttyUSB0
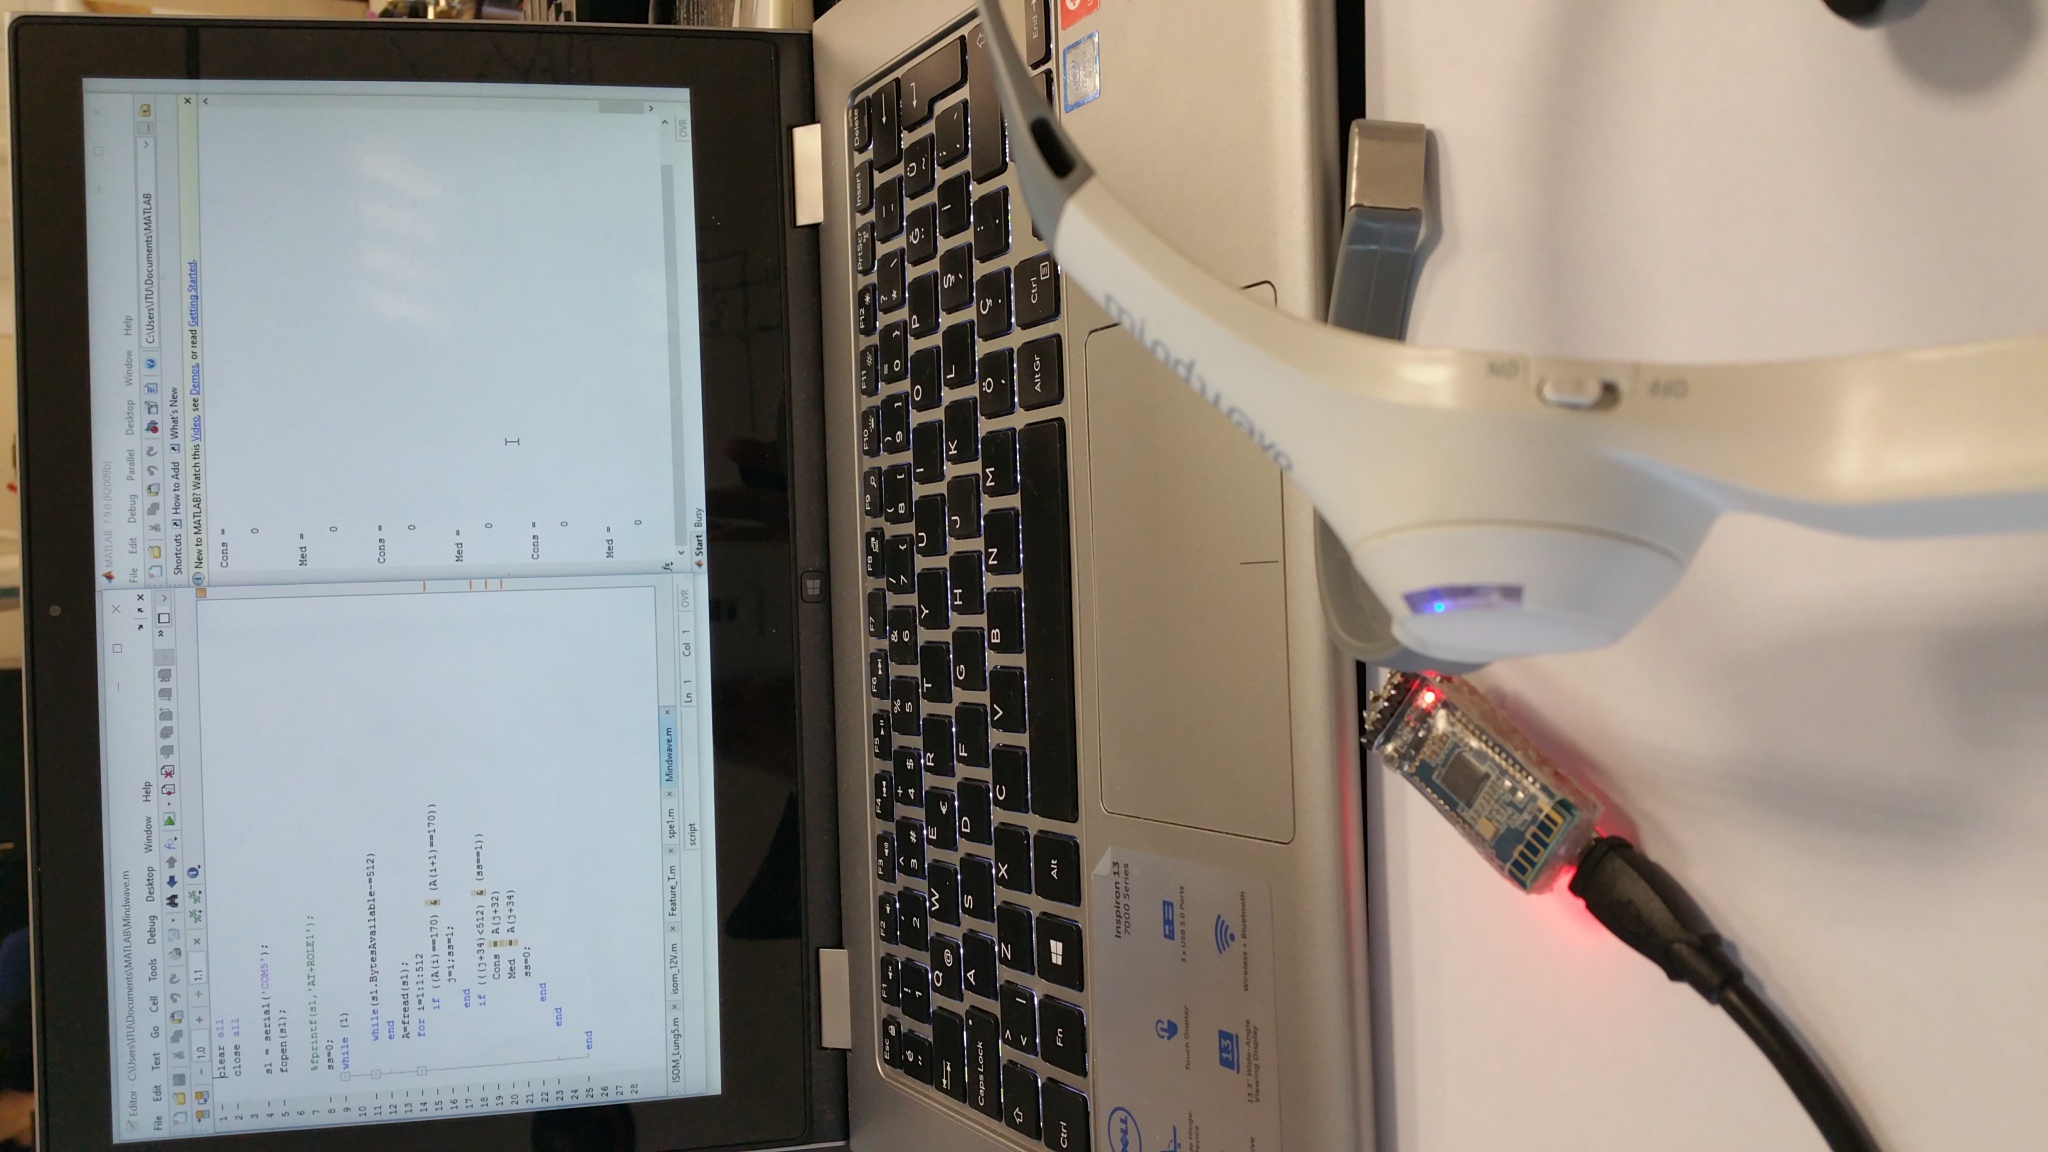
After pairing process, you can use
it on MATLAB of the MS Windows. MATLAB uses the virtual serial port to
communicate with the HM 10 Bluetooth module. Find the virtual port by using
“Device Manager”. Do not forget that you can read the serial port only after
filling the serial buffer. MATLAB file is shown in the Figure 6.